Monday, July 29, 2013

[VIDEO REVIEW] Just Released 2014 Scott Genius 740 Sweet All Mountain Bike

The 2014 Scott Genius 740 Bows Only to the 2014 Scott Genius LT 


It's one of the first Giant bikes available in 650b platform, and it's really well specced for the price. It may not be the best option for your first bike, but if you're looking for a step up from your first mountain bike, you will find both value and quality in this machine.

The Genius has 150mm adjustable suspension front (and rear) suspension that's tunable via a lever on the handlebars. You can change from fully open and plush 150mm travel, medium 110mm of travel, or lock it out completely for grueling climbs.

The Drivetrain is a Ten speed Shimano with Deore Shifters, Shimano SLX Front Derailleur and Shimano XT Rear Derailleur. It even has the option of an oversized axle on the back with interchangeable dropouts that let you change between a traditional 135x10, 135x12 thru axle and the new 142x12 mounting standard.

Built in chainguard, internally mounted cables, entry level disc brakes, and it rides great. Why don't you come by one of our locations to take a test ride for yourself!

 
Check back later this week to see a review of the 2014 170mm Genius LT!


Friday, July 26, 2013

Brand New 2014 Felt Z100, Z95, Z85, Z5 and Z4s Released

2014 Felt Z Series is A Perfect Blend of Comfort and Performance


From Felt.com:
The 2014 Z Series is specifically designed to deliver top-tier handling with all-day capability.

Felt Z frames use a slightly taller head tube for greater flexibility in stem and bar position, as well as overall rider compartment. They feature sloping top tubes for increased stand over clearance, and benefit from improved vertical compliance from an enhanced cockpit layout. The Felt Z uses a slightly longer wheelbase for confident handling at any speed. Design goals of the Z were simple: make a race ready bike without limiting rider position or all day capability.


Starting off the group is the Z100. It offers excellent road performance for the more recreational rider who can see the quality in a lightweight, responsive 6061 superlight aluminum frame. The Z1 Frameset is stiff enough for optimal pedaling efficiency, yet smooth and compliant for long days in the saddle. The Z1 UHC Ultimate+Nano carbon fiber frame is built with Felt's Dynamic Monocoque Construction and forms the perfect chassis for the Z100.

Shimano handles the components with their Claris STI (Claris clamp-on derailleur and Sora cage rear derailleur) and proprietary Felt Road Crankset. With  a 50/34T Chainwheel and an 11-32T cassette, you will have no trouble finding the right gear in most circumstances.


For a bit more money you can upgrade some components  with the Z95. This will get you a Shimano  Sora STI Drivetrain, and an FSA Tempo Compact 50/34T Crank


One level higher you will find the Z85, whose Superlite custom-butted 6061 aluminum tube frame  is lightweight, dependable, and quick. A UHC Performance carbon fiber fork and Shimano 105 drivetrain, including compact cranks for a wide range of gearing completes the Z85 performance package. Here you will find an upgrade from the Felt All Weather Tires of the first two models, to the Mavic Akison 700 x 25c tires on Mavic CXP-22 rims.


Next is the 2014 Z5. A comfortable mix of performance componentry including a SRAM drivetrain,

Felt hubs and Mavic rims, the Z5 is incredibly versatile and an all-around performer. Instant acceleration, all-day compliance - the 4 is ready for your next epic cycling journey. SRAM Rival DoubleTap shifters make shifting a breeze, especially when connected to the SRAM Apex Front and SRAM Rival (with WiFli) Rear Derailleur. Keep your rear end happy on a comfy Prologo Kappa T2.0 Saddle.


 Last is the 2014 Z4. Tour de France-worthy technology made affordable - the sophisticated Modular Monocoque COnstruction process used to build the Z5 frame, made with UHC Performance carbon fiber, produces a smooth-handling, lightweight road bike that can sprint, climb and hammer the flats with equal aplomb. Add a smart, hand-picked selection of performance parts and the Z5 is a contender.


Shimano 105 STI Drivetrain, FSA Omega BB30 Crankset, 50/34T Chainwheel all driven by a Shimano 10-speed chain.

Whether you choose a Z model built from carbon fiber lay ups, or one of the lightweight aluminum models, you'll get the same proven handling and confidence inspiring performance. The proven Felt Z Series will inspire and deliver you to new heights.


Thursday, July 25, 2013

10 Steps to Road Bike Comfort (brought to you by Bikeradar)

Some Tools Required

  • Multi-tool
  • Scissors
  • Electrical tape
  • Oil
  • Gel-tape
  • Suspension Seatpost
  • Bar Padding
  • Upright Stem 

Even BikeRadar says its hard to beat the local bike shop to get good advice and one-stop shopping. They like the fact that they can get a close-up look at the accessories and feel the textures, dimensions and weight.

Here we go. Thanks BikeRadar!

1. Handlebar Tape

The padding on your handlebars is one of the easiest and most effective ways of making your bike a more comfortable ride. Some tapes contain a gel-like material integrated into the fabric to make it even more forgiving.

After you've removed the old tape, start winding the new stuff from the bottom of the handlebars upwards. The trickiest bit is getting the tape to go around the brake lever body in a tidy way; use one of the extra pieces of tape provided to hide the lever clamp — too many wraps around the clamp zone and you may run out before you get to the top of the bars.

Finish off by cutting diagonally in line with the edge of the bar bulge and tape the edge over with some black electrical tape to make it neat and tidy.


2. Extra padding:

If regular tape doesn't provide enough comfort, another effective improvement can be made by inserting additional bits of padding under the tape and the hoods.

After positioning and holding them in place with electrical tape, try not to overlap the bar tape as much as you normally would when wrapping- you'll need to save a bit for the extra bulk and slightly bigger diameter of the padding to make it last to the end at the top of the bar.

Other padding can be installed under the brake hoods, but this takes a bit of doing, as you have to roll the rubber back far enough to make access easy and prevent folds. Do this before taping up.

3. Riser stem: heads up!

A simple stem swap can work wonders. Start by removing the old one with the bike on the ground (to stop the fork falling out). The M6 threaded Allen bolt in the top cap holds the stem to the fork and adjusts the headset.

Use a 5mm Allen key to remove the cap. You'll then be able to swap stems after loosening the clamping bolts. A light coating of grease on metallic matting surfaces or some assembly paste on carbon steerers will keep things creak-free later on.

Tighten the bar and steerer clamp bolts by nipping up gradually and evenly. Don't overdo it on modern lightweight stems with fragile 4mm Allen bolts; just tighten enough so you can't twist the bars when holding the front wheel between your legs.

4. Lever adjustment

As well as making life easier and less tiring, getting your lever reach correct will boost your confidence by increasing your braking control. Some Shimano STI levers can be moved closer to the bar by either screwing in the small adjustment screw or inserting a set of spacer rims.

You'll need to release a bit of cable at the brake anchor bolt to bring brake adjustment back to normal, then retighten firmly; but check that the cable hasn't suffered from cut strands at the old pinch point, and replace if in doubt.

If your levers have no adjustment, releasing a little cable will help you achieve an easier braking action, especially if you have smaller hands.

5. Slippery shifting

Slippery cables reduce shifting effort. Shift into the lowest gear (largest cog) at the back, then, with wheel and crank stationary, activate the return lever while gently pulling on the cable to create slack. Pop out the cable outer from the slot, wipe the inner clean, then lubricate generously with medium viscosity chain oil.

Re-insert the outers and run through the gears, making sure all housing ends are correctly seated in guides. Repeat for the front in the high gear (big ring).

6. Short & Shallow bar

The bar pictured can be a perfect solution to reach problems for those of you with smaller hands. It doesn't project as far forward from the flats as a standard bar, and it doesn't drop as low, making it easier to grab the controls/levers from the drops.

It also keeps you more upright. This modification is a little involved, as it requires the removal and re-installation of the levers. The lever clamp bolt is found underneath the rubber hood at a slight angle, on the outside of the lever body on Shimano, on top about halfway under the hood on Campagnolo and on top nearly at the bar with SRAM.

Remove the tape holding the cables, clamp the bar correctly and reposition the levers accordingly, making sure they are high enough on the bend. Tighten firmly, and then re-tape. You'll have all the advantages of a multi-hand-position drop bar without the pain.


7. Suspension seatpost

Current Far Eastern suspension seatposts are wellmade, not too heavy and come in several diamters, with 27.2mm being the most common.

If your bike's seat tube diameter is an unusual size, you may have to resort to the pricier - and generally better - USE brand, which offers a full choice of shims around its 25.0 or 27.2mm seatpost diameters.

Clean out the seat tube by partially jamming down a cloth with some WD-40 and a blunt screwdriver. Grab the exposed bit and twist several times while removing.

On steel or aluminum frames, use a piece of fine sandpaper to smooth off any sharp edges around the clamp slot inside the seat tube. Clean and grease the clamp bolt, then use assembly paste for carbon or grease for metal-to-metal while installing the seatpost.


(Comfier saddle)


An obvious port of call for increased comfort. Don't go too wide though, because if the back of the saddle gets in the way of your legs it will wreak havoc with any notions of smooth pedaling.

Clean the clamp pieces and bolts before reassembling. Apply grease to all contact points (including rails), and in particular the bolt threads and head. Set the saddle lever  ever so slightly nose down, and a bit forward of the halfway point, the goal being a more upright position with less pressure from the nose of the saddle.

As a starting point, adjust the height until your heel can't quite touch the pedal in the fully extended position (pedal at 6 o'clock). When you place the ball of your foot slightly forward of the pedal axle, you should have slight bend in the knee.

9. Bigger Tires

Moving up to bigger tires can soften the ride considerably without adding significant rolling resistance. There's usually enough room to accommodate a 28mm width in a place of a 23, but if in doubt, fit a 25.

Measure the gap between the brake calipers — in particular the fork crown — because this is where a wider tire is most likely to cause a problem. You should be able to spot whether you've got the extra 2-5mm required for clearance.

Your old inner tubes should still work fine in a larger tire unless you're making a huge leap from an 18 or 21 to a 28, in which case you might consider getting matching tubes. Make sure you seat the bead correctly at the valve before inflating, and check for tire rub against the frame, fork and brakes.

10. Rear view mirror

Ever tried to ride a racing bike in traffic after waking up in the morning with a stiff neck? Not easy, as those of you with chronic back or neck problems from previous injuries or other causes will attest.

Not only will this addition make life easier on the road, it'll make it safer. Remove the old bar plug and install the mirror in the end of the handlebar while paying attention to knee clearances. Although mirrors are designed to fit most internal diameters, you might have to file a bit of material away around the plastic wedge.

Adjust to catch a view of just the back of your rear tire in the left edge of the mirror. Having a mirror on your bars may not add the most sophisticated touch to your bike's looks, but if your neck or body is suffering from having to twist around in traffic, you'll soon appreciate it.

Monday, July 22, 2013

[VIDEO] Man Vs. Falcon... Who Will Win... The Hunter or the Hunted?

Watch as Gee Atherton is put to the test against a Falcon


Downhill mountain bike legend, Gee Atherton, is hunted by the fastest bird in the world, a peregrine falcon. Set in the epic landscape of Antur Stiniog, North Wales, Gee is tested in the ultimate experiment between man and bird.

 Gotta Ride Bikes is located at
20475 Hwy 46 West #210 in Spring Branch, TX 78070
 (830) 438-1229

Friday, July 19, 2013

2013 SRAM Red Road Bike Groupset Includes Hydraulic Brakes (Rim and Disc)

images courtesy of www.road.cc


 A Road Bike... With Hydraulic Disc Brakes?


A few months ago, SRAM confirmed rumors that they have new designs for road hydraulic brakes, one operating on the wheel rim and one disc version. 


Why have SRAM decided to introduce hydraulic systems for the road? They made sure to emphasize these three points in a press conference last week: power, control, and modulation.
Mat Brett with www.road.cc was able to sit down with SRAM's project manager Paul Kantor who further explains the desicion making behind the new designs.

Kantor begins by describing the ideas that went into the new design. He says that SRAM liked the concept of putting disc brakes on road bikes but weren't sure of it's benefits or draw-backs.


The guys at SRAM built a hydraulic coupler into a stem [to standard mechanical levers], put it on a steel cyclocross frame and experimented. While the hydraulic brakes lived up to SRAM's expectations, but the design was unnattractive and bulky. Their solution: make it fully integrated.


Later in the interview, Mat poses another question: If hydraulic rim brakes feel so powerful for such little effort at the lever, why would people want to go for disc brakes on the road? Kantor responds with a compelling argument: "Our hydraulic disc brake has a higher braking force at every lever force than a mechanical brake on an aluminum or a carbon rim, and more than our hydraulic rim brake. You can provide quite a bit more force for less hand effort and that's really what we like about most hydraulics. 


We think that Red mechanical and Shimano Dura-Ace mechanical brakes are pretty comparable, but with a hydraulic rim brake you are able to exceed that braking performance. On a disc brake we can create eve more force for the same lever effort. It's much more consistent wet and dry too because we are braking on a steel rotor that's consistent time and time again. That's where discs come into their own.

CEN (The European Committee for Standardization) requires that there's not more than a 20% drop off between wet and dry on a rim brake and we improve that substantially on a disc brake. It's more like a drop of 5-8% in bad conditions. Plus, it's a sealed system that's consistent over time.


You can run a rim brake engaged at about 550W for 6 minutes and you'll burst the tyre. [...] You can run a disc brake at 900W for 11 minutes and the brake doesn't boil and the tyre doesn't burst.

Once you start adding up all these testing elements you start to see more and more opportunity for a disc brake to exceed what's already out there."
You might be asking yourself: Why not just go for discs, then? 

Mat replies to that also, saying that SRAM really likes the way rim brakes ride, and that they're all about choice. They want to put many good options out there to allow the customer to make the choice. 

He says hydraulic rim brakes may eventually win out over hydraulic ones, but he doesn't think so. 

When can you afford one? Mat predicts that hydraulic disc brakes will come down in price over the next 4 years to a 105/Rival price point. He says at that point they will have to decide to either: make a fancy mechanical disc brake or see if they can push the hydraulic technology down further. 

SRAM will be selling the rotors separately. They recommend a 140mm rotor for off-road and 160mm for higher speeds on the road.


The weight is 449g per wheel (including lever, caliper, hose, and 160mm HSX rotor). The HHR caliper brake uses forged aluminum arms and a SwissSTop pad compound, and weighs in at 387g per wheel- lever, caliper, and 600mm of housing. 


The new SRAM components should be available from May to June. 


SRAM sponsored pro teams will be keen for the teams to use the hydraulic brakes, although it will be the rim version as UCI regulations don't permit discs. Stay tuned to the blog, we will be talking more about the SRAM Red 22 groupset.


Gotta Ride Bikes is located at
20475 Hwy 46 West #210 in Spring Branch, TX 78070
 (830) 438-1229

22 Cycling Issues and Solutiuons

Is Your Bike Making Weird Clicks or Creaks? Don't Worry, Here are 22 Common Issues And Their Solutions.

1. You fixed a puncture, and the new tube keeps going flat

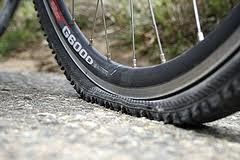
If the holes in the tube are in the bottom, the rim strip may be out of position, allowing the tube to get cut by the spokes. If they're on top, there may be some small sharp object stuck in the tire. Find it by running your fingers lightly around the inside of the tire, then remove it.

2. A remounted tire won't sit right on the rim

Let the air out, wiggle the bad spot around, reinflate to about 30 psi, and roll the bad spot into place with your hands. By pushing the tire in toward the middle of the rim you will be able to see if any of the tube is poking out. When the tube is fully inside the tire, inflate as normal.

3. A patch won't stick to the glue on the tube

Apply more glue and let it dry completely, about five minutes (DO NOT BLOW ON THE GLUE) When you apply the patch, avoid touching its sticky side with your fingers.

4. A creaking sound from the wheels

A spoke may have loosened. If tension is uniform, the sound might be caused by a slight motion of the spokes against each other where they cross. Lightly lube this junction, wiping off the excess.
A creaking sound when you pedal
Tighten the crankarm bolts. If the arm still creaks, remove it, apply a trace of grease to the spindle, and reinstall the arm.

5. The large chainring flexes, and the chain rubs against the front derailleur cage.

Check for loose chainring bolts

6. You have removed the chainrings to clean the crankset, but now the front derailleur doesn't shift right. 

You may have installed a chainring backward. Remove the rings and put them on correctly. Usually, the crankarm bolts fit into indentations on the chainrings. Sight from above too, to make sure there's even spacing between the rings.

7. While trying to remove or adjust a crankarm you stripped the threads- Now you can't remove it

Ride your bike around the block a few times. The crankarm will loosen and you'll be able to pull it off.

8. Shifter housing rubs the frame, wearing a spot in the frame

Put clear tape beneath the housings where they rub.

9. Noisy sloppy shifting can't be remedied by rear derailleur adjustment

The cassette lockring might be loose, allowing the cogs to move slightly and rattle around on the hub. You need a special tool to tighten the lockring fully, but you can spin it tight enough with your fingers to ride safely home or to a stop.

10. The cog cassette is getting rusty

A little rust won't damage the cogs quickly, so it's not a major concern. Usually, using a little more lube will prevent additional rust, and riding will cause the chain to wear away the rust while you're pedaling.

11. In certain gears, pedaling cause loud skipping

There may be debris between the cogs. If you can see mud, grass, leaves, twigs, or any sort of foreign matter trapped between cogs, dig it out. It's probably keeping the chain from settling all the way down onto the cog to achieve a proper mesh. If there's no debris, a cog is probably worn out. Most often this is a sign that the chain and cassette will have to be replaced.

12. Front derailleur won't shift precisely to a chainring

Check that the cage is parallel to the chainrings (when viewed from above), and loosen and reposition the derailleur if necessary. If it's parallel, you probably need to adjust the high- and low-limit screws, best done by a shop.

13. The rear derailleur makes a constant squeaking noise

The pulleys are dry and need lubrication. Drip some light lube on the sides, then wipe off the excess.

14. Braking feels mushy, even though the pads aren't worn out

The cable probably stretched. Dial out the brake-adjuster barrel (found either on the caliper or on the housing closer to the lever) by turning it counterclockwise until the pads are close enough to the rim to make the braking action feel as tight as you want.

15. Braking feels grabby

You probably have a ding or dent in the rim. This hits the pad every revolution, causing the unnerving situation. Take your bike into the shop.

16. One pad drags against the rim or stays significantly closer to the rim than the other

Before messing with the brakes, open the quick-release on the wheel, recenter the wheel in the frame and see if that fixes the problem. (This is the most common solution.) If the wheel is centered but a pad still rubs, you need to recenter the brake. On most modern brakesets this is done by turning a small adjustment screw found somewhere on the side or top of the caliper. (There may be one screw on each side, as well.) Turn the screw or screws in small increments, watching to see how this affects the pad position. If you center the brake and the wheel, and a pad still drags on the rim, it probably wore unevenly from being misadjusted; sand the pads flat and recenter everything. 


17. With each pedal stroke you hear a click coming from the saddle

The pedal may have loosened. Tighten it.

18. Squealing Brakes

Wipe the rim to remove any oil or cleaning reside. If this doesn't work, scuff the pads with sandpaper or a file. Still noisy? The pads need to be loosened, then toed in; an adjustment that makes the front portion touch the rim before the back- an easy fix for a shop, a tortuous process for a first timer.

19. Creaking Saddle

Dip a tiny amount of oil around the rails where they enter the saddle, and into the clamp where it grips the rails. Heritage purists take note: Leather saddles sometimes creak the same way that fine leather shoes can. There's not much you can do about this.

20. You can never remember which way to turn the pedals

Treat the right-side pedal normally — righty-tighty, lefty-loosey. The left side pedal has reverse threads (to keep it from unscrewing during pedaling). If that's confusing, just remember this simple phrase: Back off. This can remind you that, with the wrench engaged above the pedal, you ALWAYS turn toward the back of the bike to remove the pedal. 

21. You installed a pedal into the wrong crankarm - The left pedal into the right arm or vice versa

You can remove the pedal, but the crankarm will have to be replaced; its threads are softer than the pedal's and are now stripped out. ALWAYS check the pedals before installing. There is usually an R for right or an L for left stamped onto the axle. 

22. You pulled apart your headset to regrease it, and now the headset feels tight no matter how you adjust it

The bearing retainers are probably in upside down.

Gotta Ride Bikes is located at
20475 Hwy 46 West #210 in Spring Branch, TX 78070
 (830) 438-1229

Thursday, July 18, 2013

For 2014, Shimano Released an 11-Speed Ultegra 6800 Groupset

Shimano Reveals Ultegra 6800 Groupset

   
photos courtesy: Shimano


For 2014, Shimano has released their Ultegra 6800 11-Speed Groupset. Dave Atkinson of road.cc interviewed Shimano's Mark Greshon. He has this to say about the new group: "Ultegra normally takes the latest technology from Dura-Ace and provides it at a much more competitive price. It's for real world riders who want good performance."
The 11-speed phenomenon with Shimano's engineering power to create this new system that "uses technology that's been proven in WorldTour races, proven at the highest level."
Riders can individually choose from a large variety of gearing options for all kinds of riding. You have the choice between a 11-23 and an 11-32 cassete, and chainring combos include 53-39, 52-36, 50-34, and cyclocross specific 46-36. The 6800 crank shares the same 4 arm design as the Dura-Ace in this category.
The brakes feature the same two axle symmetric pivot design as Dura-Ace as well, an improvement that Shimano claims increases power by about 16 percent. They are available in both a traditional and a direct mount version.
Using a shorter lever stroke which Shimano claims requires 35% less force input, gives tactile feedback to the rider that the shift has been completed. A defined *click* sound will ensure you that the gear has shifted. Improvements on ergonomics and control come from the more compact hoods and bracket grip, as well as a redesigned carbon lever.
The new wheel on the 11-speed level is the WH-6800. The wheel is lightweight on an offset rim for high rigidity and power transmission. Compatible in tubular, tube, and tubless setups. As with all Shimano wheels, the WH-6800 is 100% in-house produced and hand assembled.
The chain has also been redesigned for 11-speeds, and is coated with new surface technology called Sil-tec: an advanced surface painting technology adds a low friction surface treatment that runs smoother and lasts longer.
 

All in all the new groupset is 35g lighter, and 100% improved.

Gotta Ride Bikes is located at
20475 Hwy 46 West #210 in Spring Branch, TX 78070
 (830) 438-1229