
Showing posts with label bike shop san antonio. Show all posts
Showing posts with label bike shop san antonio. Show all posts
Monday, February 17, 2014
Thursday, February 6, 2014
6 Ways To Improve Hand Comfort On The Road
 Experiencing Pain or Discomfort In Your Hands? Maybe This Will Help -

Check Out Our Recent Post About Pedaling Efficiency HERE!

1. Handlebar-Shoulder Ratio:
One way to get an idea of what width handlebars works best is to measure the distance between your shoulder blades. Have someone hold a yardstick against your back to take a reading.
Drop handlebars come in sizes ranging from about 38-cm to 44-cm wide and you select by matching the width of your shoulders. So, if the distance between your shoulder blades is 42-cm, that's what the handlebar width should be, measured from the center of the other end. Some manufacturer's measure from outside-to-outside, so check with us if you're not sure.
2. Improve Breathing and Control
The right bar width will provide comfort and increased efficiency because you'll be able to breathe better. It's especially noticeable if you've been using too-narrow a drop handlebar and you climb frequently. You'll appreciate additional leverage too, whenever you stand.
3. Extra Padding
If regular tape doesn't provide enough comfort, another effective improvement can be made by inserting additional bits of padding under the tape and the hoods. In this case, we've used the excellent Marsas foam inserts.
After positioning and holding them in place with electrical tape, try not to overlap the bar tape as much as you would normally when wrapping – you'll need to save a bit for the extra bulk and slightly bigger diameter of the padding to make it last to the end at the top of the bar.
Other padding can be installed under the brake hoods, but this takes a bit of doing, as you have to roll the rubber back far enough to make access easy and prevent folds. Do this before taping up.
 4. Bar Tape
The padding on your handlebars is one of the easiest and most effective ways of making your bike a more comfortable ride. Some tapes contain a gel-like material integrated into the fabric to make it even more forgiving.
After you've removed the old tape, start winding the new stuff from the bottom of the handlebars upwards. The trickiest bit is getting the tape to go around the brake lever body in a tidy way; use one of the extra pieces of tape provided to hide the lever clamp – too many wraps around the clamp zone and you may run out before you get to the top of the bars.
Finish off by cutting diagonally in line with the edge of the bar bulge and tape the edge over with some black electrical tape to make it neat and tidy.
5. Try Higher Bars
Riser bars are also available, which are models that slope upwards on the ends to provide less bend in your back when you lean forward to grab the grips. Many off-roaders find that risers are just the ticket for a more comfortable position. THey're also typically a bit wider than flat bars to provide additional leverage, which is helpful on technical terrain.
 6. Lever Adjustment
As well as making life safer and less tiring, getting your lever reach correct will boost your confidence by increasing your braking control. Some Shimano STI levers can be moved closer to the bar by either screwing in the small adjustment screw as shown (Sora models) or inserting a set of spacer shims (current Tiagra, ST-R600, ST-R700).
You'll need to release a bit of cable at the brake anchor bolt to bring brake adjustment back to normal, then retighten firmly; but check that the cable hasn't suffered from cut strands at the old pinch point, and replace if in doubt.
If your levers have no adjustment, releasing a little cable will help you achieve an easier braking action, especially if you have smaller hands.
Friday, December 20, 2013
Redeem Gift Cards at Gotta Ride Bike Shops or Spend Christmas Cash on Cycling Accessories!
That Extra $50 from Nanna Is Enough To Get Almost Anything On This List!
Sometimes your friends and family members aren't up to par when it comes to buying specific gifts that really meet your utmost needs. Some of these friends and family members have long ago decided to quit giving gifts and start giving cash or gift cards to their loved ones. Come on over to Gotta Ride to find something that you KNOW you'll like.

1. Serfas Combo Kit - $49.95
Everything you need to get on the road. Saddle bag, front/rear light, multi-tool, patch kit/tire levers, and mini pump.

2. Enzo's Button Hole Chamois Creme - $19.95
Our most popular chamois creme.

3. Nite Rider Solas 2W Taillight - $44.95
At 2w, this light can be seen a long way away. 4x as bright as most higher-end taillights at only a slightly higher price. USB rechargeable means no AAA batteries to go dead on you.

4. Clearview Micro Mirror - $14.95
Attaches to most any helmet, provides great vision with a minimal footprint

5. Bike Helmets
Previous year helmets by Bell, Giro, LG Mavic on sale for half off!

6. Louis Garneau Arm Warmers - $22.95
A must for winter cycling!

7. Serfas TSL-200 Headlight - $64.95
The TSL-200 Headlight is great for the bike commmuter who's looking for an extra light punch from a USB rechargeable that comes in such a small package.

8. Louis Garneau Electra Jacket - $22.95
A must for winter cycling!

9. Gizmo Wooly G Socks - $12.95
Merino wool for colder days
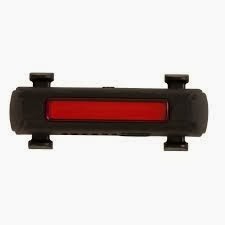
This USB rechargeable light is the brightest rear light that we have. It features a wide non-directional beam to maximize visibility from side angles. Easy to move from bike to bike with the silicone attachment system. Runs 2 to 9.5 hours on a charge.
Thanks For Shopping With Us!
Wednesday, November 13, 2013
Top 5 Reasons To Replace Your Helmet
 Will Your Head Be Safe?
Obviously, if you have been in a crash, or if the helmet is in two pieces, you will have to get yourself a new one. But maybe you haven't considered one of the reasons on this list. Be informed. Be safe.
1. Helmet manufacturers recommend replacing helmets every five years.
And it's not so they can sell a bunch of new ones. It's because the materials in a helmet break down over that time causing the helmet to lose some of it's impact-absorbing ability, which means in a crash, you're at risk!
2. Helmets are constantly improving.
Today's designs are drastically superior to those we were wearing just a few years ago. Helmet manufacturers have engineered features like better cooling vents, feathery weight, and extra protection against concussions, all of which make it worthwhile to upgrade regularly.3. Significant Accidents or Falls
EPS foam is made to compress upon heavy impact. This disperses the force of the impact sothat the helmet, not your skull, is taking the brunt of the blow. However, EPS foam does not completely regain its shape after a major impact. The bottom line from every source is that, if the helmet has been in an accident, replace it, even if it does not look damaged.
4. The outside is just foam or cloth instead of plastic, or it doesnt have a CPSC, ASTM or Snell sticker inside, or you just can't get it to fit!
Obviously foam and cloth are not protective enough, but there are still some helmets floating around out there that aren't up to the safety code that manufacturers established in the 1990s. And anything that doesn't fit is probably not good for your ride.
 5. It's not a cycling helmet
It's a good idea to wear a different helmet for each sport you participate in. If you skateboard, or do some activity where you crash regularly, you may not want to wear that helmet for cycling, as it could be less prepared for the types of falls that can occur when riding.Stay updated on cycling news and more by bookmarking our blog (You can also like us on Facebook or follow us on Twitter to get all the updates as they are released!
Friday, October 4, 2013
10 Symptoms of Cycling Addiction
 Are You an Addict?

If one or all of these apply to you, you could be!
1. You spend more on your bike than your car2. Only the bottom 2/3 of your legs are tan
3. Your surgeon tells you that you need a heart valve replacement; you ask if you can choose between Presta and Schrader

4. You have more pictures of your bike than yourself
5. (Guys) You actually shave your legs to gain a bit more speed. Let's not elaborate on this one.
6. When you are forced to drive, you drive with the windows open or the AC on to simulate riding your bike.
7. There are more jerseys in your closet than dress shirts.
 8. Biker chick means black spandex, not leather, and a Scott Contessa Women's Road Bike, not a Harley.
9. Protein bars start to taste better than Snickers or Twix
10. You find out early on a first date that she doesn't ride a bike; and immediately try to find ways to end the date early.
We hope you enjoyed our list, feel free to comment and add more ways to know if you are a cycling addict!

Monday, September 9, 2013
2013 Scott Plasma Premium Road Bike Named Best in Men's Fitness Top Ten!

World Record Setter, Fastest Ironman Tri Bike
Scott Plasma Premium
Scott’s Plasma Premium tri bike was the fastest steed in this year’s Kona Ironman World Championship, when Sebastian Kienle powered his mount to a rookie win. The bike also set an Ironman world record last year with a super aero carbon frame that shaves weight where it isn’t necessary and reinforces key areas for maximum efficiency. We’re not saying you’ll win the next Kona, but you’ll break records—if only your own. Caveat: faster and lighter means an emptier pocket.
Check out a NEW Scott Mountain Bikes HERE: The 2014 Scott Genius 740 (Video Review)
or, Check out ANOTHER Scott Bike that Made a "Top List" on BikeMagic HERE

Here are the features of this incredible bike:
Integrated Steering System:
Fully integrated frame and stem system, Toptube, and stem continuity. Fully integrated cable routing is compatible with Shimano Di-2
IMP Technology Twin Turbo
Scott's engineers have developed IMP, one of the newest technologies applied to carbon production. The toptubne, headtube, seat tube and down tube are produced in a single step using a top-secret process. Scott's proprietary process allows for lighter construction by removing 11% of the material from the headtube intersection while increasing strength by utilizing high modulus stressed fibers for more precise fiber placement in critical areas. To compliment the IMP process, the frames benefit from the Naked External Tubeset which eliminates the cosmetic carbon layer to shave precious grams.
Adjustable Seatpost
The integrated seatclamp increases the bike's aerodynamic properties and reduces drag without sacrificing function.SPEC LIST
Fork: Scott Plasma 3, 1" carbon, Integrated
Headset: Ritchey WCS Integrated, 1" drop-in headset
Rear Derailleur: Sram Red Carbon Ceramic, black
Front Derailleur: Sram Red Carbon, black
Shifters: Sram Red, R2C Carbon Shifter
Brake Levers: Profile ABS Carbon
Crankset: Sram Red Carbon black, 53 x 39 TT
BB-Set: Sram INT BB Press Fit
Handlebar: Profile Svet
Stem: Profile Plasma 3, 1", 31.8mm
Pedals: None included
Seatpost: Plasma 3 with Ritchey WCS, adjustable head
Seat: Fizik Arione Tri 2 Carbon
Front Hub: Zipp
Rear Hub: Zipp
Chain: Sram Red PC-1091
Cassette: Sram Red, 10 speed, 11-25
Spokes: Zipp
Rims: F: Zipp Carbon 404 Firecrest Tubular R: Zipp Carbon 808 Firecrest Tubular
Tires: Continental Competition Tubular, 28"x 22 mm
Weight: 7.50 kg / 16.52 lbs
Friday, September 6, 2013
Bicycle Maintenance Checklist - Before and After Ride, Monthly, Yearly
 If You Want To Keep Your Bike in Tip-Top Shape, You Should Follow This Daily, Weekly, Monthly, and Yearly Maintenance Checklist
Perhaps you just bought a new bike. Or maybe you have been riding for quite some time now— either way it is important to make sure that your bike is operating properly all the time!
Of course, the type of riding, the frequency that you ride, and the terrain you ride on all play a role in determining your maintenance schedule. If you ride 150 miles a week through mud and rain, you will need to be much more vigilant about keeping your bike in good working order. Conversely, if you are a recreational rider that only rides a few days out of the week, you can be a little more relaxed in your routine. But don't get too relaxed!

• Check tire air pressure
• Check brakes and cables
• Make sure your crank set is tight
• Make sure your quick release hubs are tight
AFTER EVERY RIDE:
• Inspect tires for glass, gravel shards, and cuts on tread and sidewall.
• Check your wheels to see if they are still true
• Clean the bike's mechanical parts as necessary. Once a week or every 200 miles. Lubricate chain (with dry lube; or every other week/400 miles with wet chain lube).
ONCE A MONTH:

• Completely clean the bike, including the drivetrain if necessary
• Inspect and lubricate brake levers, derailleurs, and all cables.
• Inspect pedals and lubricate SPD style cleats. Inspect tires for wear, rotate or replace if needed
• Inspect and check for looseness in the:
→ Stem binder bolt
→ Handlebar binder bolt
→ Seatpost binder bolt (or quick release)
→ Seat fixing bolt
→ Crank bolts
→ Chainring bolts
→ Derailleur mounting bolts
→ Bottle cage bolts
→ Rack mounting bolts
→ Brake and derailleur cable anchors
→ Brake and shifter lever mounting bolts
→ Brake mounting bolts
EVERY THREE MONTHS:
• Inspect frame and fork for paint cracks or bulges that may indicate frame or part damage; pay particular attention to all frame joints
• Visually inspect for bent components: seat rails, seat post, stem, handlebars, chainrings, crankarms, brake calipers and brake levers.
EVERY SIX MONTHS:

ANNUALLY:
• Disassemble and overhaul; replace all bearings (if possible); and remove and if necessary replace brake and shift cables. This should be performed at 6,000 miles if you ride more than that per year. If you often ride in the rain or mountains you may want to overhaul more often.
Visit Gotta Ride Bikes Today at Either of Our Great Locations!

Wednesday, August 21, 2013
Easy Tips To Perfect Your Pedaling

When It Comes To Increasing Pedaling Efficiency, The Number One Rule Is: PRACTICE!
One pedaling drill you can do on any ride with downhills is spinning the pedals as quickly as possible as you accelerate down slopes. To do this correctly, leave the bike in a gear that's too easy, one that forces you to fan the pedals to keep up with the speed of the bike. Your goal is to rev your legs as quickly as you can while remaining seated. At first, you'll probably bounce a lot on the seat. But, with practice, you should be able to stay in the seat and maintain a calm upper body even though your legs are spinning at supersonic speed. If you do this drill a lot, your pedaling speed and efficiency will quickly improve.
Try Rollers
If you're willing to purchase a handy piece of cycling equipment, a great way to smooth your spin is to train indoors on rollers. Rollers consist of a frame with three spinning drums (one for the front wheel, two for the rear), with a rubber belt connecting the front drum to one of the rear drums. You put your bike on the rollers and start to pedal and you can balance and ride just like you do spinning down the road outside. Most rollers have optional equipment that allows increasing resistance because there isn't much drag from just the roller unit itself.


Rollers require above-average balance and exaggerate any pedaling flaws. With enough practice, you naturally eliminate pedaling problems because they're so noticeable. And, when that happens, you ride faster with the same effort because your pedaling becomes more efficient and more of your energy goes into driving the bike.
Think they're just for roadies? Actually, the concentration and spin improvement builds confidence and the ability to ride tight singletrack, maintain your balance in slick mud and skirt narrow ledges high in the mountains, too.
Forced Spinning
A classic cycling trick to improve pedaling technique is riding a fixed-gear bike in the winter. Constant pedaling is required because you can't coast. And you must accelerate pedal speed on downhills because you can't shift. These factors combine to smooth your pedal stroke and force you to spin complete circles. Pick ride routes that avoid steep climbs and descents. You don't need to buy a new bike to pull this one off, either. A threaded-hub wheel, a track cog, a BMX chain and a few axle spacing tricks can turn your regular bike into a fixed-gear rig. We can help with the conversion.
Try The Track
If you're one of the privileged few who can ride a track bike at a velodrome (a circular, banked track for cycling), you'll reap the same benefits as training on a fixed-gear bike. Never ride a track bike on the road, though. Brakes are a must on the street, and track bikes don't have them.
Did You Enjoy This Post? Check Out this one on 10 Steps to Road Bike Comfort
Hearing a Weird Noise? Creaky Crankset? Check out 22 Common Cycling Issues and Their Solutions
Come to Gotta Ride Bikes for all your cycling needs.

Monday, August 19, 2013
[PHOTOS] 2013 Felt Compulsion: THE ALL MOUNTAIN TRAIL BIKE!
 2014 Felt Bikes Are Coming Out, But Don't Forget About Their Incredible 2013 Models Like the 2013 Felt Compulsion

Yes, the 2014 bikes are still great. Check out our previous post on one of the new lines: Here.
The Compulsion is Felt's do-it-all trail machine. It has patented Equilink suspension and adjustable 150mm or 160mm of fully active travel. That means you can get up the hill faster, yet also have a lot of fun on even the most technical descents. With Equilink, the Compulsion produces the efficiency and as compliant pedaling as a true trail bike.

The weight of all the models of the Compulsion was reduced to be more able on the trail. Felt also changed the head angles of this years bike to improve the handling. For 2013, Felt used all new links and hardware to beef up the stiffness and strength of this trail bike.
 Shimano Handles the entire drivetrain, ensuring quality and compatibility through the whole bike. It's shifters, front and rear derailleur, crankset, brakes and wheelset are all Shimano Deore XT.
Having parts that are all made from the same manufacturer and are the same model make this bike unbeatable when it comes to compatibility.

Monday, August 12, 2013
2014 Serfas Lights Includes Their Highest Powered Ever (TSL-2500)
2014 Serfas TSL-2500 is at the Top of the Line, Followed by TSL-1000, 750, 550, and 350

All new for 2014, the TSL-2500 is the newest, greatest light from Serfas: their highest powered light EVER. The body is constructed from a combination of nylon and alloy for shock resistance, and features a ram air cooling system to keep the four LED lights from fying
Includes Handlebar Mount, Helmet Mount, Wire Switch, Extension Cable, Wall Charger, and Ballistic Nylon Hardcase for storage
Run time: 1.45 hours (High)
Charge time: 4 hours (Wall)
Wired Remote Switch for on-the-fly mode changes of headlight and optional taillight (TL-80)

Next in the line up is the TSL-1000. Offering 1000 lumens in a smaller, more compact package than the TSL-1000+. It uses just 2 LEDs instead of three, and also has a thunderbolt tail light built into the battery pack!
By simply strapping your battery back to your seat post, you are also strapping on a tail light. Like the 2500, the T1000 has a USB port built into the battery pack for on the go accessory charging.
Includes Handlebar Mount, Helmet Mount, Wire Switch, Extension Cable, Wall Charger and Ballistic Nylon Hardcase for storage
Run time: 2 hours (High)
Charge time: 4 hours (Wall)
Wired Remote Switch for on-the-fly mode changes
Finally, the USB rechargeable stand alone lights get a boost with the new TSL-750, 550, and 350, all with matching amount of lumens.

TSL-750:
• Produces 750 lumens
• Includes (USB) Wall Adapter for Charging
• Includes Quick Release Helmet AND
Handlebar Mount AND Presentation Box
• Run Times: 1:30 (HIGH), 2:40 (LOW), 3:20
(HIGH BLINK), 7:30 (LOW BLINK)
• Charge Time: 4 Hours (WALL)
 TSL-550:
• Produces 550 lumens
• Includes (USB) Wall Adapter for Charging
• Includes Quick Release Helmet AND
Handlebar
Mount AND Presentation Box
• Run Times: 2 (HIGH), 3:40 (LOW), 4:40
(HIGH BLINK), 9:30 (LOW BLINK)
• Charge Time: 4 Hours (WALL)

TSL-350:
• Produces 350 lumens
• Includes (USB) Wall Adapter for Charging
• Includes Quick Release Helmet AND
Handlebar Mount AND Presentation Box
• Run Times: 3:30 (HIGH), 4:30 (LOW), 7:30
(HIGH BLINK), 18 (LOW BLINK)
• Charge Time: 4 Hours (WALL)
Come by either of the Gotta Ride Bikes locations to see all the products that Serfas has to offer, plus much, much more!

Monday, August 5, 2013
VIDEO - 2014 SCOTT Addict SL - Lighter than EVER
2014 Scott Addict is Their Lightest Ever With Improved Carbon Layups and Increased Aero Efficiency
"The Legend is back, and lighter than ever. The all-new 2014 SCOTT Addict SL has been redesigned from head to toe, and boasts a frame-set that weighs in at just one kilo- their lightest bike ever."


Images from pelotonmagazine.com
The newest version of the Addict SL takes carbon fiber development to the next level. They've worked on the carbon fiber layup and use T1000 carbon fiber with a resin that is reinforced with carbon nanotubes. Scott claims that this process is how they have been able to reduce so much weight without compromising in stiffness.
Their precise placement of HMX SL, along with other levels of carbon is what makes the Addict lighter and stronger, as well as making the bike very stiff. SCOTT has gone to a monocoque mold for the front triangle, also adding strength and stiffness. The rear seat stays have been re-designed for more compliance while helping shed 12g of weight. The forks on the bike are another key design in their goal of making the bike more comfortable with added vertical compliance.

Next is the Addict Team, which is the Orica GreenEdge frame. It uses HMX carbon so is a touch heavier with a little less strength as their are less layers of carbon. The Team issue comes with Shimano Dura-Ace 11 speed and uses Syncros carbon components and RL1.1 carbon clincher wheels.
The Addict 10 and 20, at more of an affordable price range, are made using SCOTT’s HMF carbon, which doesn’t have quite as much tensile strength as the HMX or the HMX SL, but is still very strong. The Addict 10 comes with a Shimano Ultegra drivetrain, Syncros cockpit and Syncros alloy wheel set. The 20 comes with an entry level Shimano drivetrain and Shimano Alloy wheels.
Monday, July 29, 2013
[VIDEO REVIEW] Just Released 2014 Scott Genius 740 Sweet All Mountain Bike
The 2014 Scott Genius 740 Bows Only to the 2014 Scott Genius LT
It's one of the first Giant bikes available in 650b platform, and it's really well specced for the price. It may not be the best option for your first bike, but if you're looking for a step up from your first mountain bike, you will find both value and quality in this machine.
The Genius has 150mm adjustable suspension front (and rear) suspension that's tunable via a lever on the handlebars. You can change from fully open and plush 150mm travel, medium 110mm of travel, or lock it out completely for grueling climbs.
The Drivetrain is a Ten speed Shimano with Deore Shifters, Shimano SLX Front Derailleur and Shimano XT Rear Derailleur. It even has the option of an oversized axle on the back with interchangeable dropouts that let you change between a traditional 135x10, 135x12 thru axle and the new 142x12 mounting standard.
 Built in chainguard, internally mounted cables, entry level disc brakes, and it rides great. Why don't you come by one of our locations to take a test ride for yourself!
Check back later this week to see a review of the 2014 170mm Genius LT!

Subscribe to:
Posts (Atom)